How to Organize Products Using POS Categories for Faster Retail Operations
Learn how to create and manage POS categories to improve product organization and cashier efficiency.
Step-by-Step Process
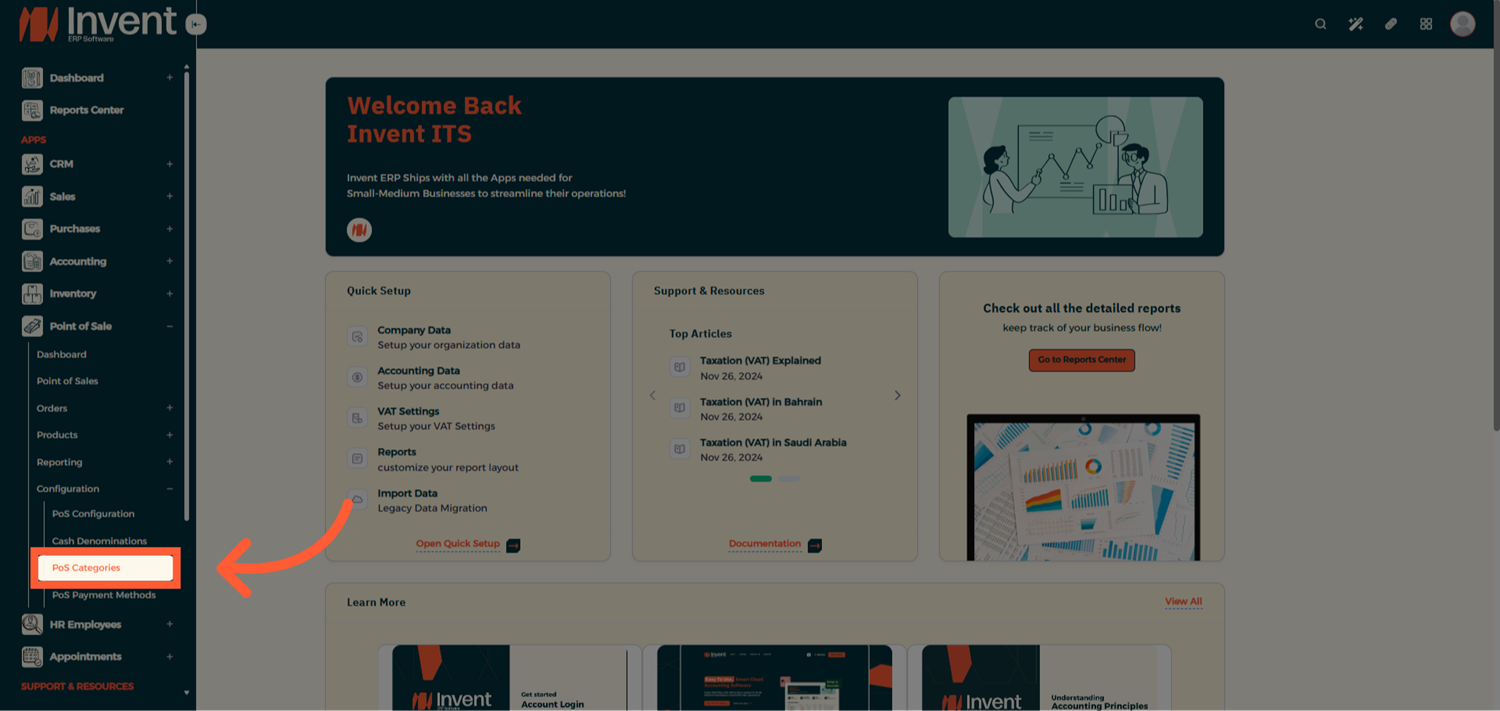
Step 1: Open POS Categories
From the Main Menu, go to Point of Sale → Configuration → POS Categories.
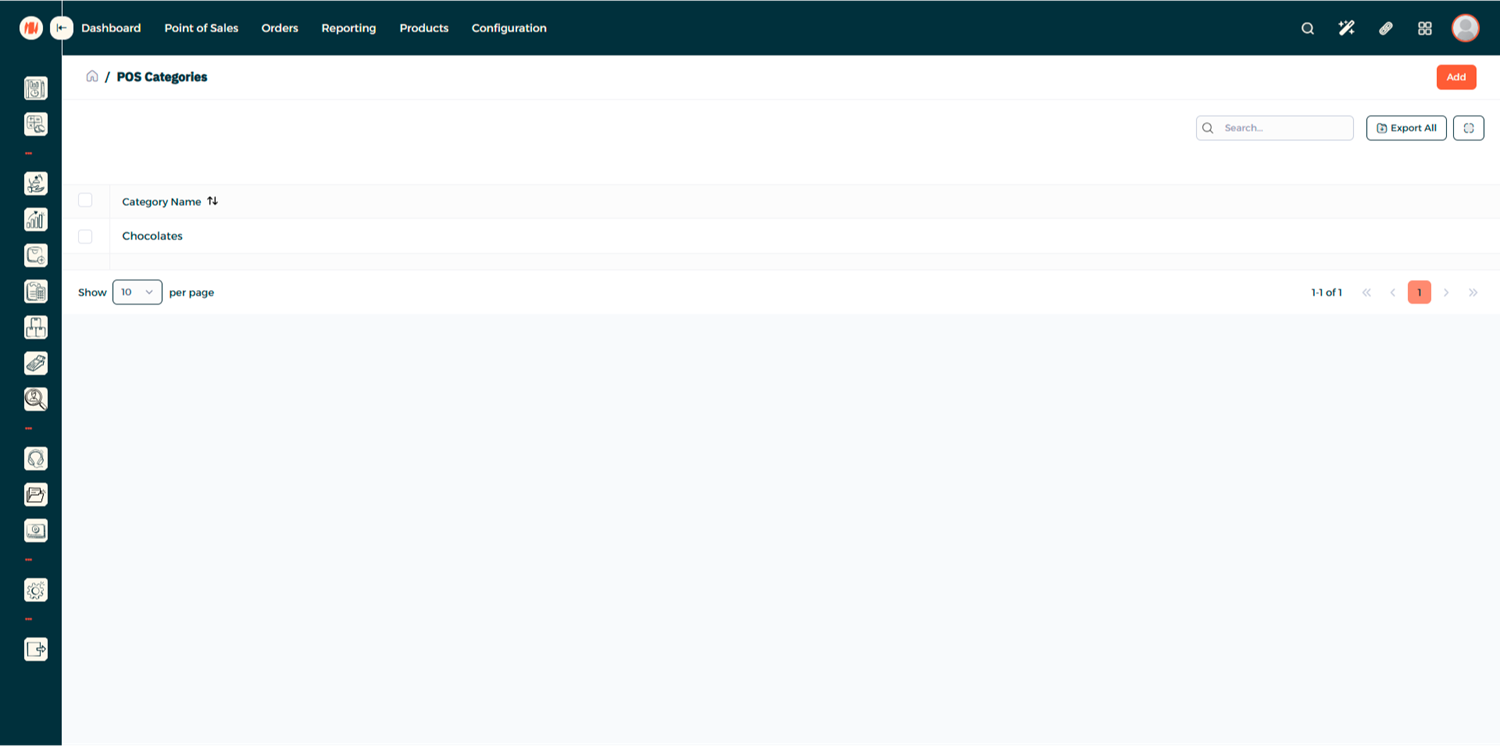
Step 2: POS Categories List
Here you will be able to view all the existing POS Categories, go ahead and click add to add a new one.
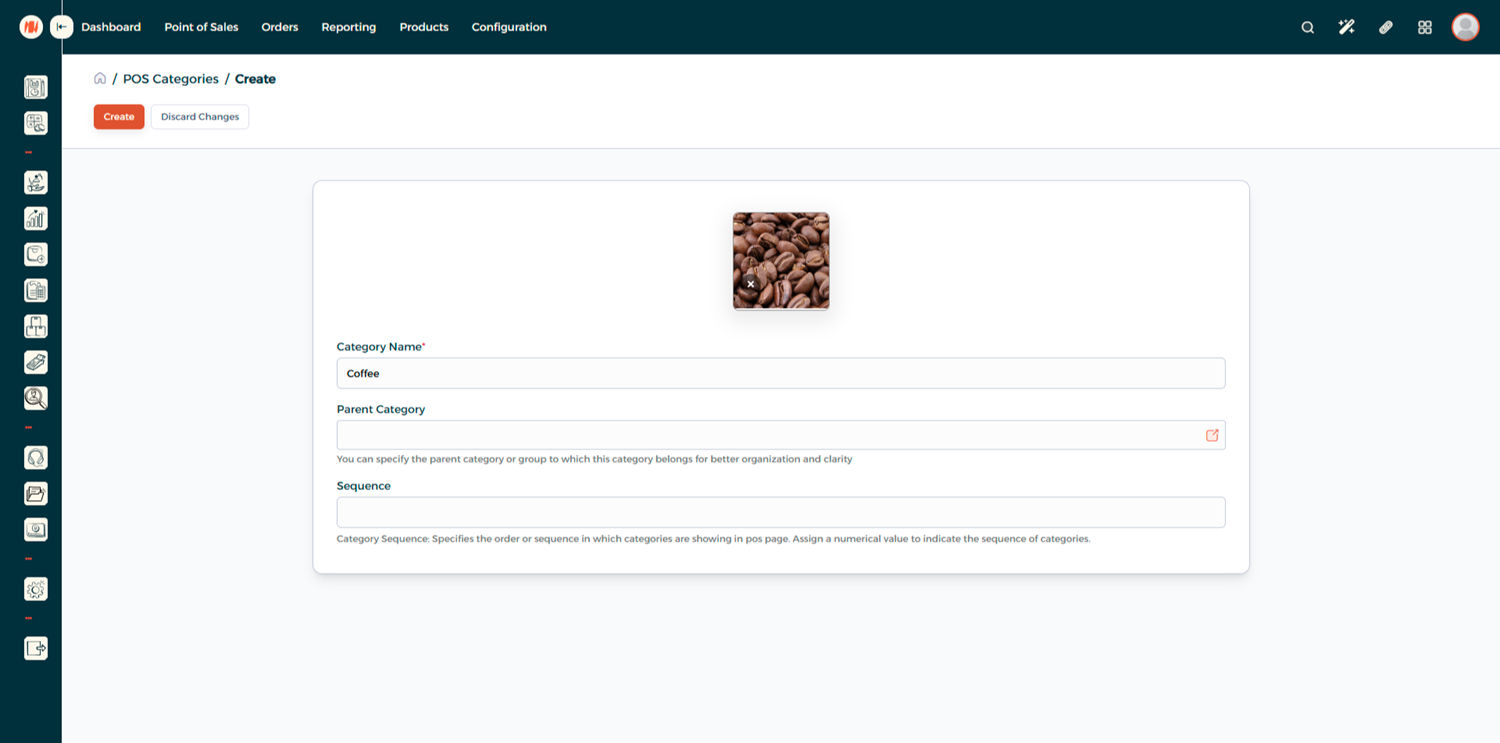
Step 3: Create a New Category
Start adding the details of the category.
- Category Name: Enter a short, descriptive name for your category
- Parent Category (Optional): You can specify the parent category or group to which this category belongs for better organization and clarity.
- Sequence: Specifies the order or sequence in which categories are showing in pos page
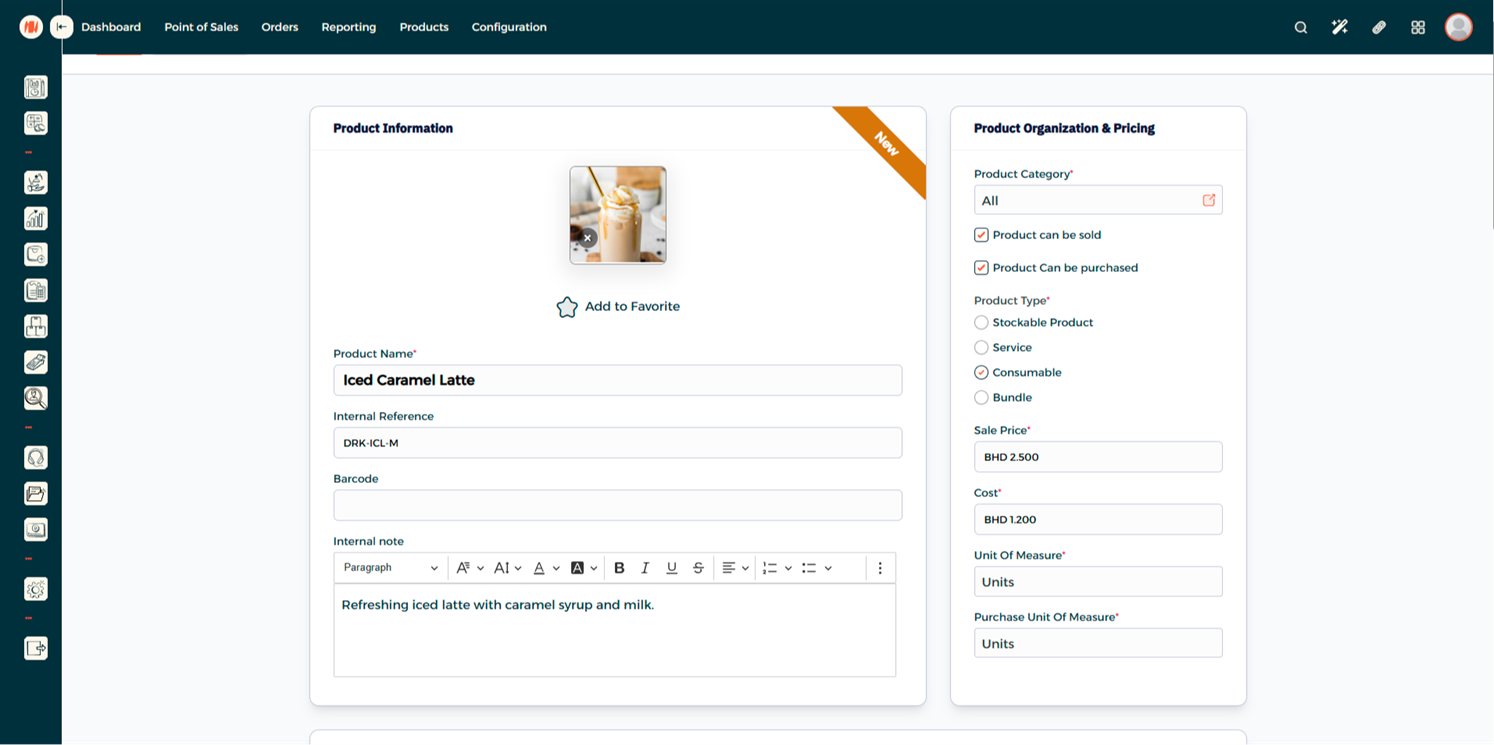
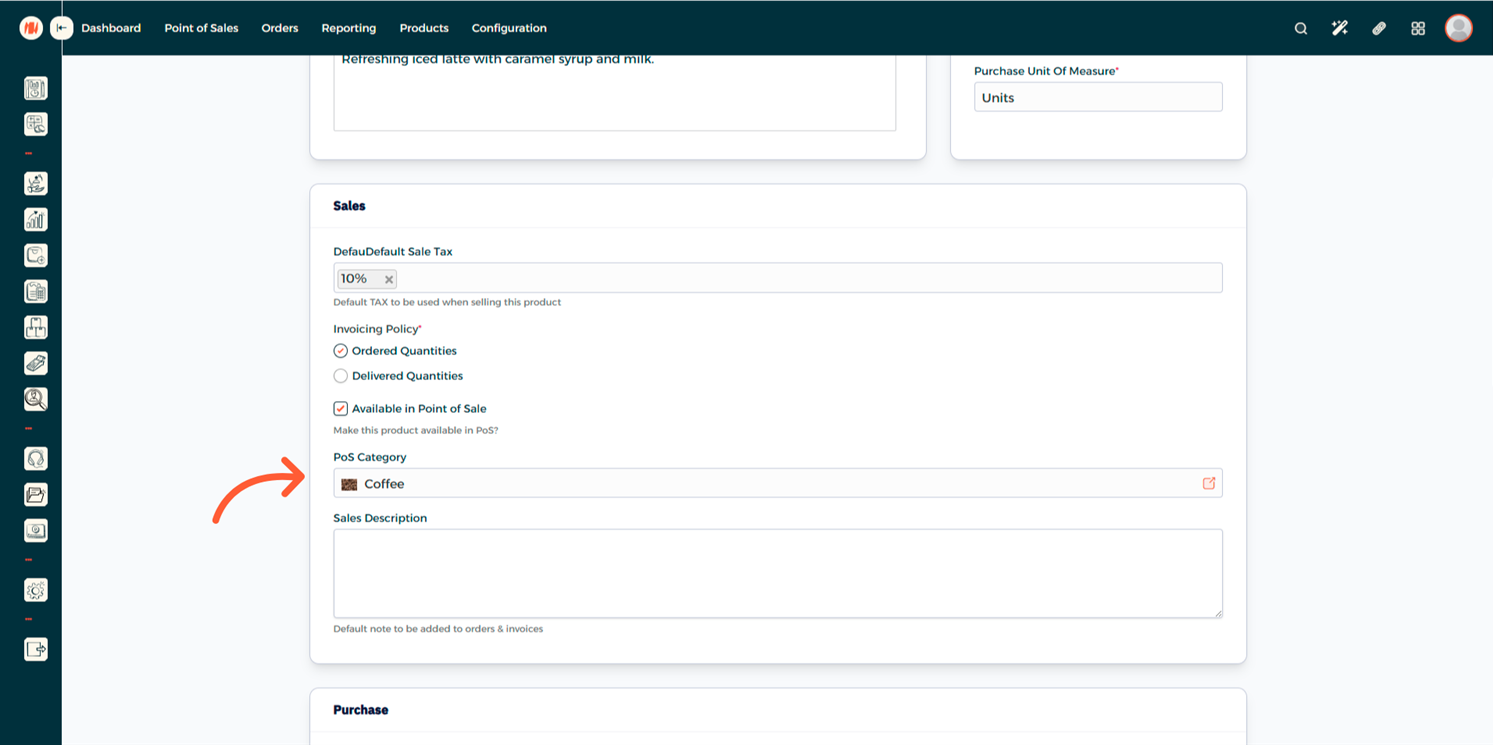
Step 4: Assign Category to a Product
From the products page go to one of your products (or add a new product) scroll to sales and check the available in POS check box and a category under it
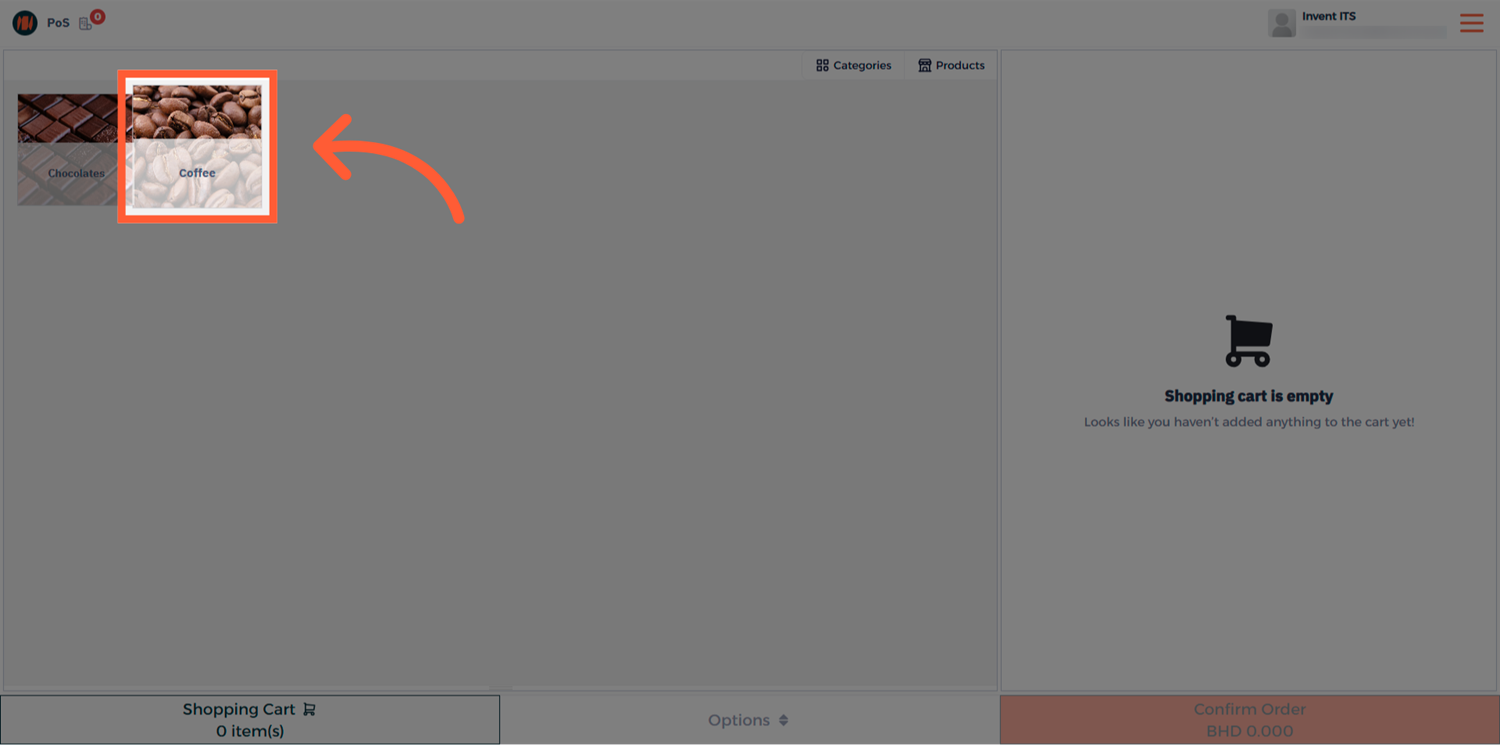
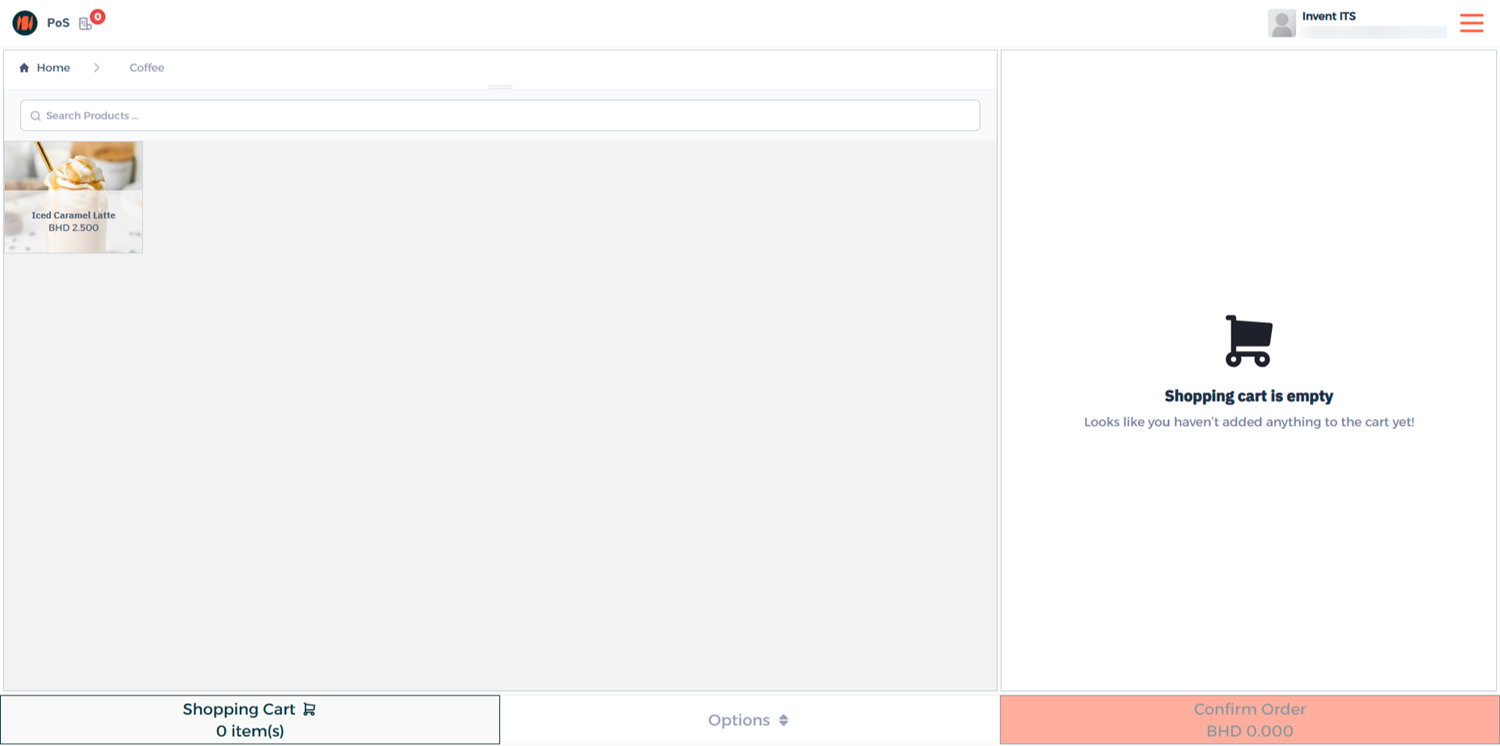
Step 5: Find your Category in POS
Go to Point of Sale → Point of Sales, and open your POS session. On the POS screen, locate your new category — it should now appear with its assigned image and name. Tap on it to view all products linked to this category.
Notes & Tips
- Adding icons or product-style images to each POS category helps users locate items faster.
- Limit category names to one or two words.
- Adjust the Sequence number to control the order of categories on the POS screen. Place your most popular categories first for quicker access.
FAQ
Q: Can one product belong to multiple POS categories? No, each product can only belong to one POS category at a time. This ensures accurate reporting and prevents duplication on the POS interface.
Q: Will changing a category’s sequence affect all POS terminals? Yes, sequence settings are shared across all POS sessions that use the same configuration.
Q: How can I hide certain categories from a POS session? Go to your POS Configuration and use the Restrict POS Categories option to display only selected ones.